How to Import data?
The automateCRM supports Importing data into all the Modules such as Leads, Contacts, Organizations, Opportunities, Tickets, Quotes, Invoices.
Simple Steps to be followed:
A. Upload CSV file
1. Log in as an Admin user.
2. Go to Main menu > Marketing > Contacts Module.
3. Click on the "Import" button.
4. Select the type of file you would like to import.
5. Next click on Select From My Computer "which allows the users to upload the CSV file from the local database.
6. Has Header Field: If your CSV file "Has a Header" you can select not to create a record for the first row from your CSV file during the import. So it will skip the first row which is the header and will import the rest of the data present in the CSV file.
7. Character Encoding: select the appropriate Character set in which your Import file has been encoded.
8. Delimiter: supports comma(,) or semicolon(;) as Field Delimiter. The Fields in your CSV file are recognized only if they are separated with Delimiters.
9. Click on the Next button.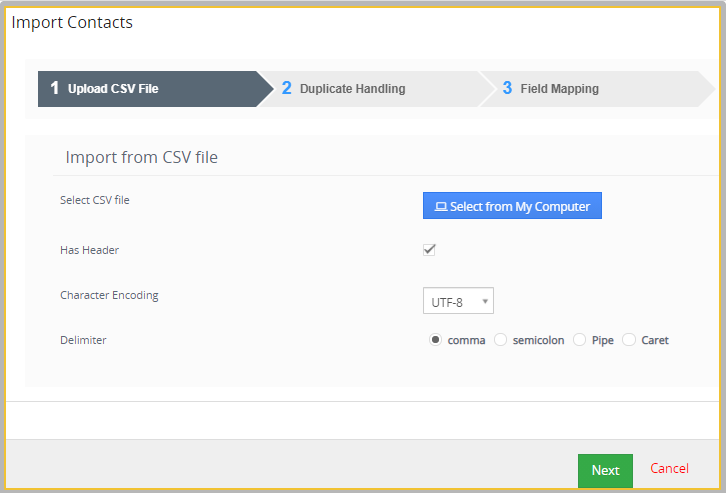
B. Duplicate Record Handling.
This feature restricts the creation of duplicate records in the CRM while doing an import.
10. Select how duplicate records should be handled. It can be done in 3 ways:
a. Skip:
b. Overwrite:
c. Merge:
C. Field Mapping.
If the header name in the CSV file matches the Field labels, they are automatically selected.
11. You will need to Map the Import file Header/column to the fields. Fields will be automatically Mapped if your CSV file header matches with the field label.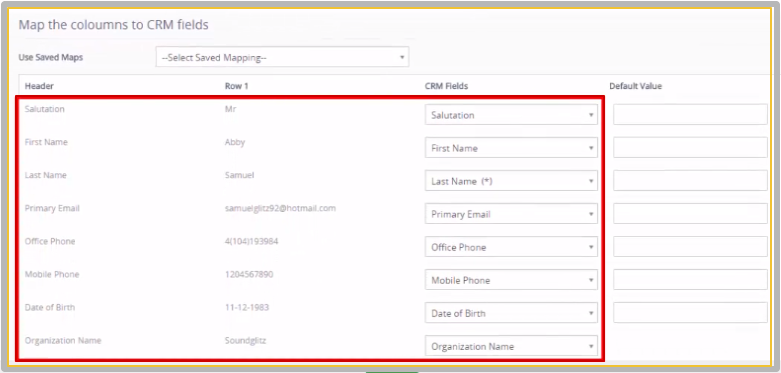
12. You can save the Mapping for future Imports by selecting "Select Saved Mapping".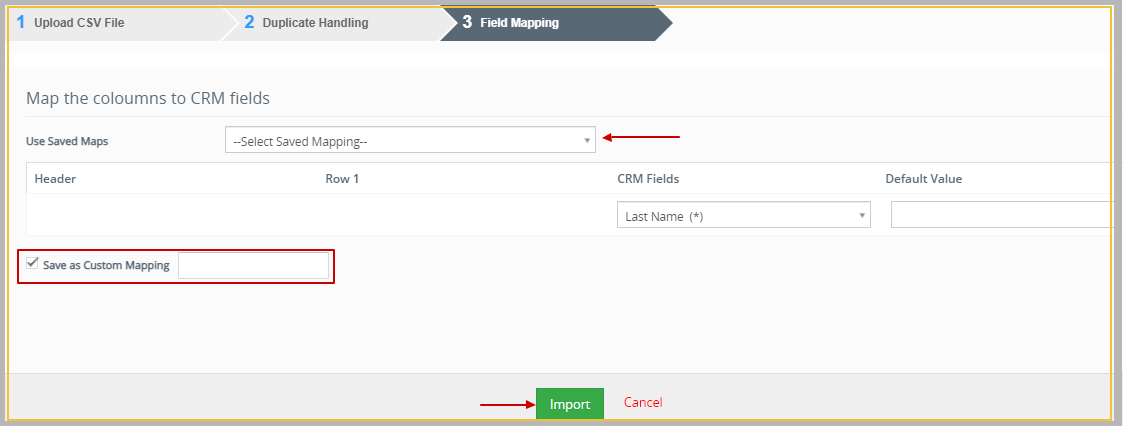
13. To start the Import process > click on the Import button.
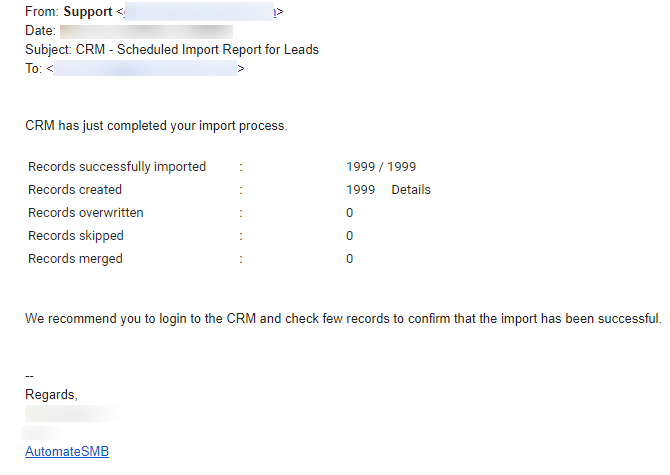
Finally, the import process will get generate a report showing below:
a. A number of records were imported.
b. Records created.
c. Records overwritten.
d. Records skipped.
e. Records Merged.
f.You can also import more records by clicking on the Import more button.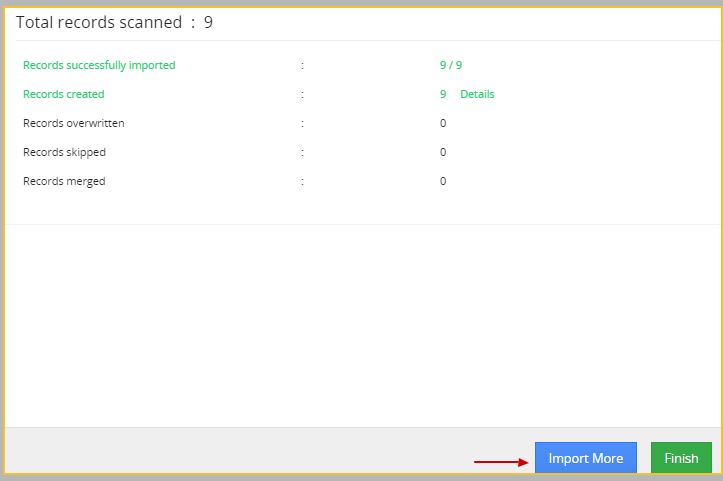
Schedule Import
When more than 1000 records are imported at once then automatic import is scheduled for the data and once all records importing are done, the user who imported the data will get a notification on mail on his primary email id present in the CRM profile.
The below image is an example of Schedule Import: